1. Download and install the Arduino IDE (latest Version tested: 1.6.9)
https://www.arduino.cc/en/Main/Software
2. Install the WinoBOARD Addin
-
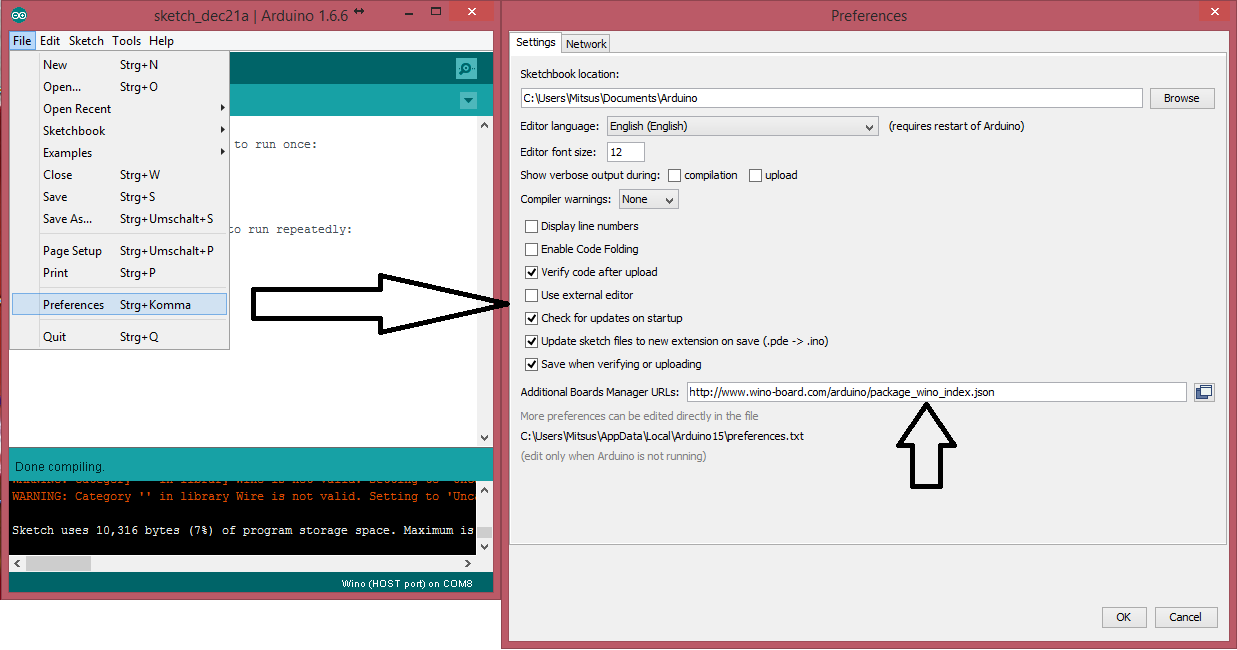
Start the Arduino IDE and change to
File->Preferences - Add following URL to the Additional Boards Manager URLs:
http://www.wino-board.com/arduino/package_wino_index.json
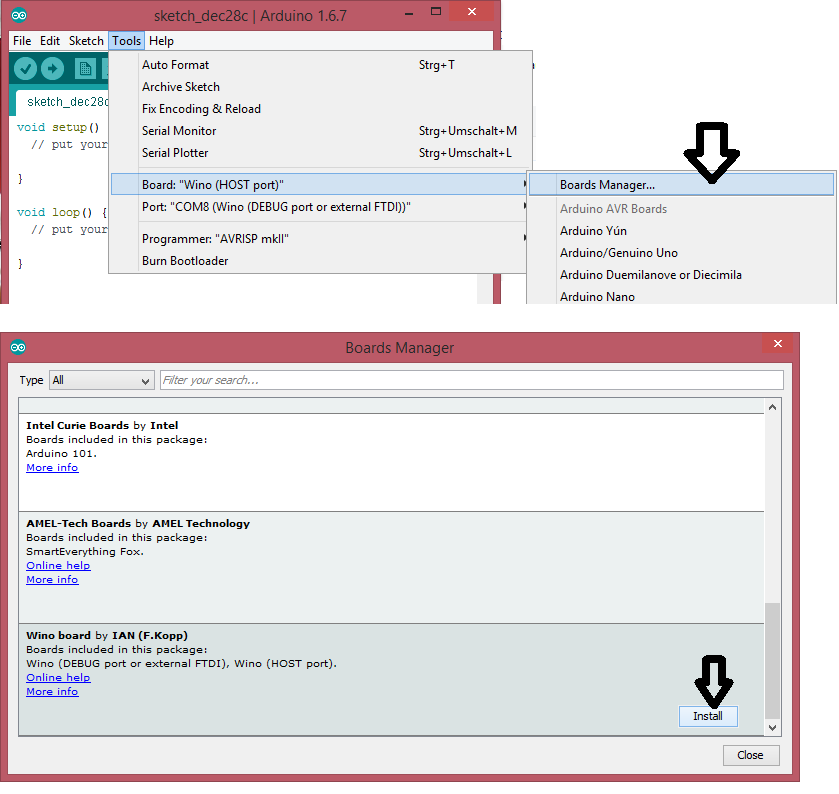
- Open the board manager by changing to
Tools->Board->Boards Manager - Install the WinoBOARD package (should show up last on the list)
3. Connect the Wino board
- Connect the WinoBOARD to an USB-Upgrade or Programming board
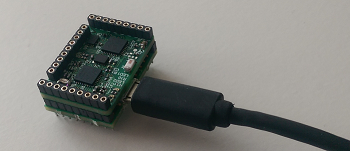
- Connect the board to USB
- Select the board
WinoBOARD [USB]in theTools->Boardmenu - Select the USB port in the
Tools->Portmenu
4. WIFI-Setup
-
power up your Wino board
-
connect to the wifi network calles "Wino board setup"
-
open up a web browser and change to page "192.168.4.1"
- select your wifi network and connect
After this steps your module will automatically connect to your network at each start.
For now please use the AT commands to control the WIFI module.
5. Upload your code
Please make sure you selected the Wino board (Host port) and the right COM-port in the Arduino->Tools menu.
You are now able to upload your code to the board. You can try one of the tutorials (work in progress) or try some of the existing Arduino tutorials out there.
This page also may help you to getting started in the Arduino universe:
https://www.arduino.cc/en/Guide/HomePage
Here is a simple LED-blink example and turning on WIFI module:
void setup() {
  pinMode(2, OUTPUT);
}

void loop() {
 digitalWrite(2, HIGH);   // turn the LED on (HIGH is the voltage level)
 delay(1000);              // wait for a second
 digitalWrite(2, LOW);    // turn the LED off by making the voltage LOW
 delay(1000);              // wait for a second
 }